How to Open
Access the Revenue Tracker from:
- Home → Command Dock → Revenue
- Home → Command Dock → Expenses
Both buttons open the same Revenue Tracker — "Revenue" opens the income view, "Expenses" opens the expenses view.

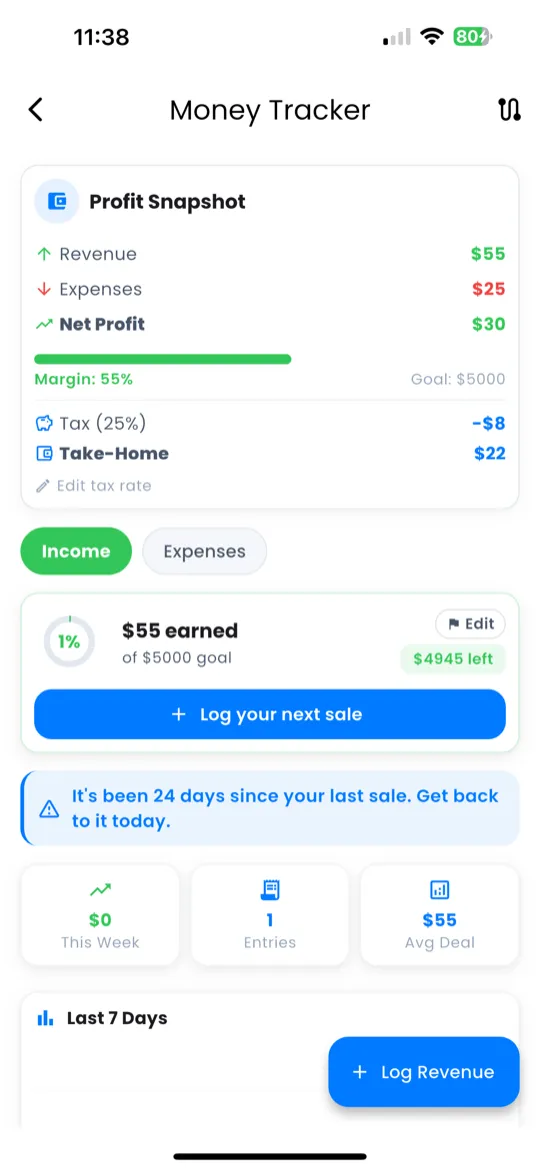
Overview Screen
The top of the Revenue Tracker shows your financial summary at a glance:
- Total Income — all income entries combined
- Total Expenses — all expense entries combined
- Profit — income minus expenses
- Chart — visual graph showing income and expenses over time
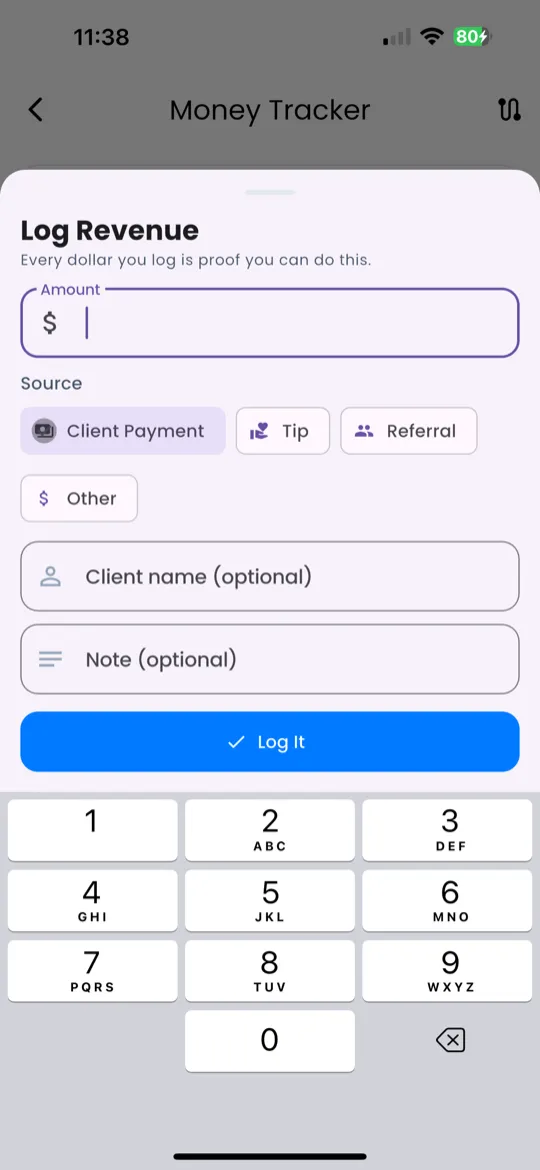
Logging Income
To log income:
- Tap + Income.
- Enter the amount.
- Select a source:
| Source | When to Use |
|---|---|
| Client Payment | Payment received for a service |
| Tip | Extra amount from a satisfied client |
| Referral | Money earned from a referred client |
| Other | Any other income source |
- Add an optional note (e.g., "Hair braiding for Amara's wedding").
- Tap Save.
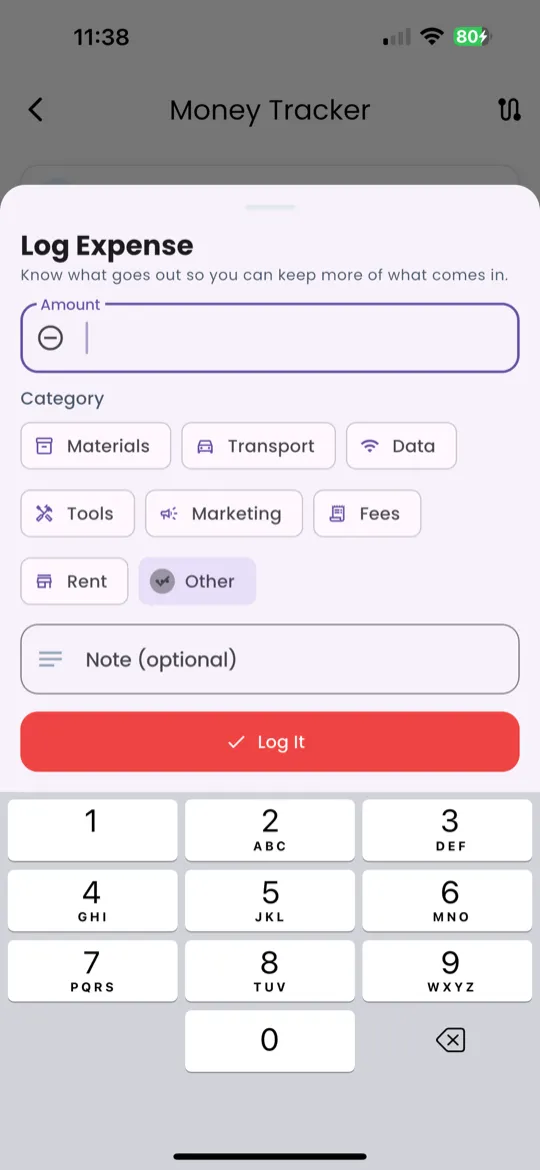
Logging Expenses
To log an expense:
- Tap + Expense.
- Enter the amount.
- Select a category:
| Category | Examples |
|---|---|
| Materials | Hair extensions, nails, ingredients |
| Transport | Uber, fuel, bus fare to client |
| Data/Airtime | Mobile data, WhatsApp bundles |
| Tools | Equipment, brushes, devices |
| Marketing | Ads, flyers, promoted posts |
| Fees | Platform fees, transaction charges |
| Rent/Space | Salon rent, market stall, workspace |
| Other | Any other expense |
- Add an optional note (e.g., "Bought braiding hair for Saturday clients").
- Tap Save.
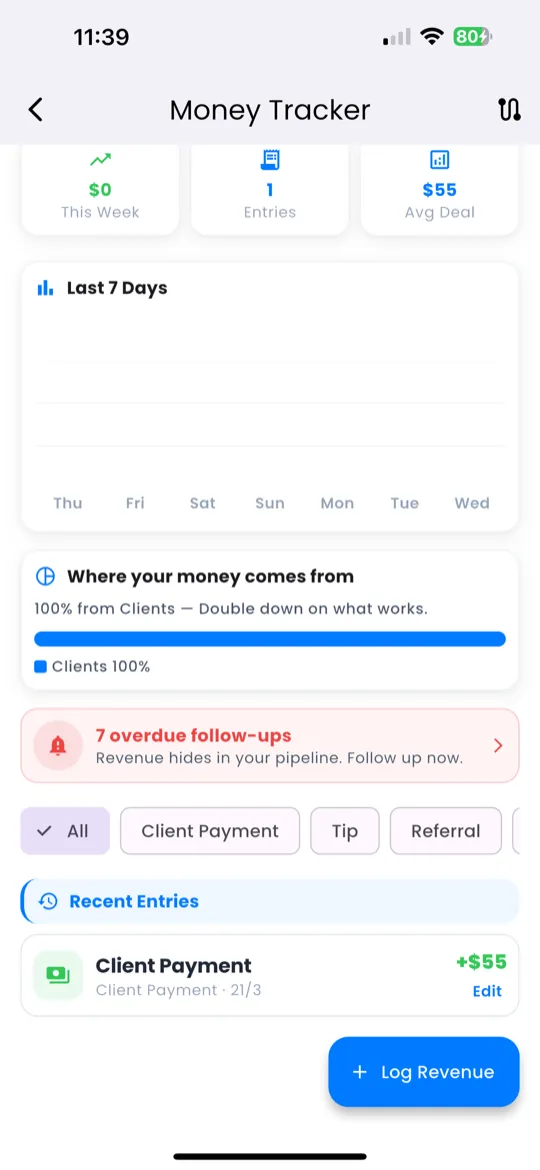
Viewing History
Below the overview, you'll see your full transaction history:
- Green entries = income
- Red entries = expenses
Each entry shows:
- Amount
- Source/Category
- Date
- Note (if any)
Use the filters at the top to narrow your view:
- Filter by date range — see a specific week, month, or custom period
- Filter by type — show only income or only expenses
Revenue from Check-In
If you log income during your Daily Check-In, that entry automatically appears in the Revenue Tracker. You don't need to enter it twice.
This keeps all your financial data in one place, whether you log it from the Revenue Tracker directly or during your daily check-in flow.
